As PCBs age, they may become damaged due to a variety of factors. Despite the complexities of PCB assembly and production, they are repairable. Besides, repair circuit boards instead of replacing them directly can also help you save both cost and time. In this guide, we’ll go over the causes of circuit board failure and walk you through the steps to repair circuit boards.
What Causes Circuit Board Failures?

PCB failure can occur for various reasons. Before we begin to repair circuit boards, it’s crucial to find the main issues. Here, we highlight some common causes of PCB damage to help your troubleshooting process.
Physical Damage
This damage usually results from external shock, improper handling, or unexpected events like drops, severe collision, or improper equipment disassembly. Excessive vibration or pressure can also cause serious damage to circuit boards. These things can cause circuit boards to bend or crack, resulting in broken conductive paths and components falling off. It is essential to extend the life of the circuit boards by avoiding unnecessary physical shock.
Faulty Component
Electronic components can fail for various reasons including thermal stress, electrical overstress, mechanical stress, and natural aging. When a component is subjected to current, voltage, temperature, or mechanical stress beyond its design specifications, it may fail. These show as a component failing, loosening, or falling off the board, causing the device to not function properly. Thankfully, most component failures can be resolved by promptly identifying and replacing the damaged one. Of course, choosing high-quality components and ensuring they are properly installed and tested will minimize the risk of failure.
Damaged Circuit Trace
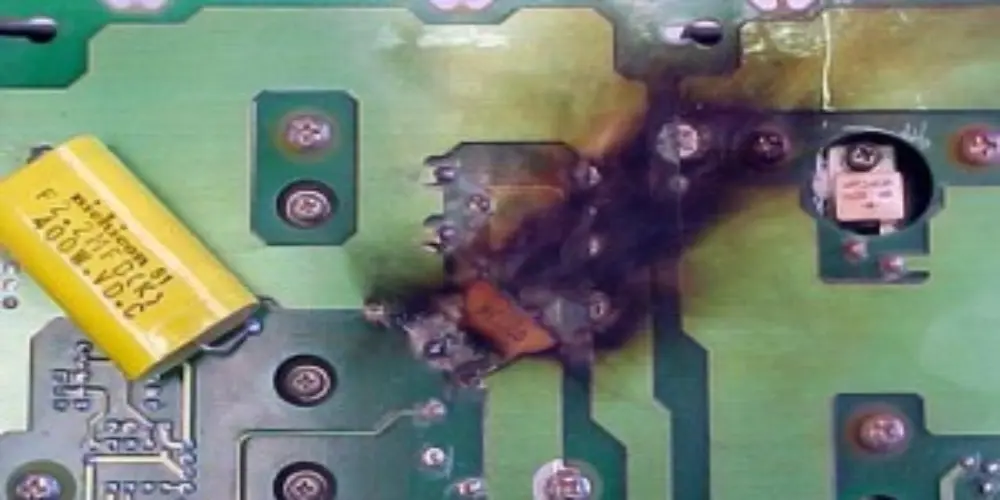
The traces are typically made of copper, carrying out electrical signals. These conductive pathways can be damaged by factors, like short circuits, lightning strikes, power surges, overheating, metal dust contamination, etc. Trace damage can seriously affect the circuit board function, blocking the current flow and causing the device to not work properly. The damage can sometimes be directly observed with the naked eye, especially when thicker traces are discolored or broken. For subtle trace damage, it is necessary to use professional equipment for precise detection.
Poor PCB Design
In the design process, designers often use PCB design software to assist in PCB layout design. However, some mistakes may also occur, like improper routing layout, which can lead to signal interference or high impedance points. These design flaws can cause signal transmission between electronic components to be blocked, and even cause frequent equipment failures. Poor PCB design may also intentionally lower design standards to cut costs. These low-quality circuit boards tend to have a very short lifespan, and even after repairs, they cannot easily be restored to normal function.
Environmental and Thermal Impacts
PCBs are highly sensitive to environmental factors. Extreme temperatures, humidity, and chemical exposure can severely damage the circuit board. When PCBs are exposed to high temperatures, electronic components may be damaged, and solder joints or substrate materials may crack. Additionally, dust, moisture, and chemical contaminants can accelerate the corrosion of copper traces, and increase the risk of short circuits.
Soldering Failure

In the soldering process, thermal voids are caused by uneven heat distribution, resulting in voids or cracks in the soldering area. Acid traps occur when there is too little or too much solder, leading to incomplete solder joints or overflow. This will eventually create small voids in which the acid may get trapped and cause corrosion and failure.
Repair Circuit Boards Safely: What You Need to Keep in Mind?
When you start to repair circuit boards, you need to take care of some key precautions to ensure safety. Below are crucial tips to remember.
Wear Protection Gear
The repair circuit board process involves soldering operations, molten solder may splash, and debris may also be generated when cutting the leads of electronic components. Repair personnel need to wear protective gear correctly. Safety glasses can prevent solder splashes and debris from injuring the eyes. Protective gloves can prevent hand oil and sweat from contaminating the circuit board and prevent hand cuts or burns. These protective measures protect the safety of the operator and ensure the quality of maintenance.
Static Protection
Electrostatic discharge (ESD) is a hidden danger that cannot be ignored during the repair circuit board process. It can cause severe damage to sensitive components on the circuit board. Maintenance personnel need to work in a dry environment and take electrostatic protection measures. Use an antistatic wrist strap, work on a grounded antistatic workbench mat, and store circuit boards in antistatic bags.
Keep Your Workspace Clean and Ventilated
When you start to repair circuit boards, corrosive substances on hands or work surfaces can damage circuit boards. These substances should be cleaned with electronics-specific cleaners. The soldering process will generate harmful fumes, it must be performed in a well-ventilated area, preferably with fans to improve airflow. Repairers should take regular breaks to minimize prolonged exposure to harmful gases, ensuring health and safety.
Power Source Safety
Before beginning repairs of circuit boards, the device must be completely disconnected from the power supply. Additionally, you should keep an eye on the residual charges in capacitors, which retain a charge, even when the power supply is removed. If they aren’t discharged correctly, they can short circuit or cause electric shocks. You have to verify that all power sources were completely disconnected in order to ensure safe repair work.
How to Repair Circuit Boards: A Step-by-step Overview
There are different ways used to repair circuit boards by the particular problems encountered. This is a general step-by-step guideline that most repair methods have to follow, outlined below. If you have identified the issues, you can repair circuit boards by following the steps.
Step 1: Prepare Tools and Materials for Circuit Board Repair
Adequate preparation means half the success of your repair. You need to prepare all the tools and materials that will be used to repair circuit boards. This can enhance repair efficiency and avoid delaying time.
Here we list some key tools and materials you may need to repair circuit boards.
- Soldering irons
- Solder Paste
- Flux
- Adhesive copper tape
- PCB Holder or Clamp
- Cotton swab
- Rubbing alcohol
- Hot air gun
- Flathead screwdriver
- Sharp knife or sandpaper
- Tweezers
- Soldering gun
- Paper clip
- Pen
- Scissors or craft knife
- ESD Wrist Strap
Step 2: Remove the Faulty Pads or Components
Fasten the board firmly to prevent any movement. The damaged area should be moderately heated with a heat gun to melt the solder. With much care, the components are taken out using tweezers. Damaged pads can be cleaned using a flat-head screwdriver or a sharp knife. You can sand the surface using sandpaper to remove the extra solder and other debris.
Step 3: Clean the Track and Remove Excess Solder

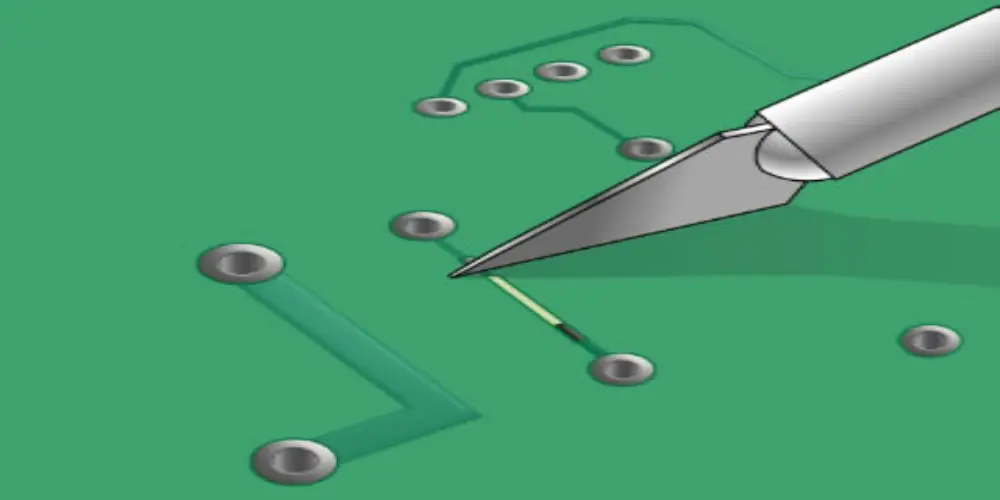
Clean the track surface using a cotton swab (dipped in alcohol) to remove dirt and solder residue when the damaged component and pad have been removed. Then use a craft knife or sandpaper to remove the damaged traces until the track’s surface appears a clean, shiny metallic color. Once the cleaning is complete the cutting location can be marked for new component installation. This cleaning process makes a stable and reliable electrical connection between the new component and the circuit board.
Step 4: Apply Copper Tape to the Tracks
Cut a piece of copper tape, about the length of the damaged track plus a little extra. Place it on the cleaned surface carefully. You need to ensure the tape overlaps the existing track, covering the through-hole area. In this way, the pad and component are properly connected.
Step 5: Solder the Joints
Solder the copper tape to the existing track joints. Put a little solder on the pad. Then heat it with the soldering gun until the solder melts, holding the tape in place. The copper tape is sensitive to heat, you are advised to complete the soldering in one time. This will minimize the heating time for better quality of the solder and assurance of circuit continuity.
Step 6: Restore the PCB Via
Clean the via of debris using a knife and swab it with an alcohol swab. Once the location of the via is determined, take a tool and expand the via to the correct size for the new component lead size.
Step 7: Replace and Re-solder Components
Replace the defective component with a new one and solder it again. The leads of the through-hole component are inserted through the repaired through-holes. Turn the board over, applying an adequate amount to the pads. Heat up with a soldering gun until the solder melts. Keep the component leads in place by holding them while waiting for the solder to cool down and solidify. Repeat the same procedure to complete the soldering of the other pad.
Step 8: Trim Excess Copper Tape
The repair area needs to be cleaned up. You should cut off excess copper tape with scissors without causing further damage to traces and pads nearby. The PCB will not be structurally restored as it is in its previous condition. With due care, it can be restored to normal functioning again.
Takeaway
PCB failures can arise from various reasons, and preliminary diagnosis can be made through professional tools or visual inspection. If you repair circuit boards timely, you can save the high cost of replacing them and help avoid losses caused by equipment downtime. Given the crucial role of PCBs in many critical applications, choosing a reliable PCB manufacturer is essential to minimize the need for rework and repairs.
UnityPCB has been delivering high-quality PCBs for nearly 20 years, leveraging advanced production facilities, cutting-edge technology, and a strict quality control process. With certifications including RoHS, UL, ISO 13485, ISO 9001, and IPC compliance, we ensure that every PCB and PCBA undergoes rigorous inspection and testing to meet the highest performance and reliability standards before delivery.


