In the PCB assembly process, dust, flux residues, and other debris can accumulate on circuit boards. These contaminants accumulate, leading to circuit board malfunctions or even complete failure. Proper PCB cleaning ensures optimal board performance, prevents corrosion, and prolongs the life of the board. In this blog, we cover 5 PCB cleaning methods, common cleaning agents, and how to clean boards step by step. This article can assist you clean your circuit boards whether you’re a professional or a novice.
Top 5 PCB Cleaning Methods
Here we will introduce 5 PCB cleaning methods with their pros and cons to help you choose the best one for your circuit boards.
Manual Cleaning
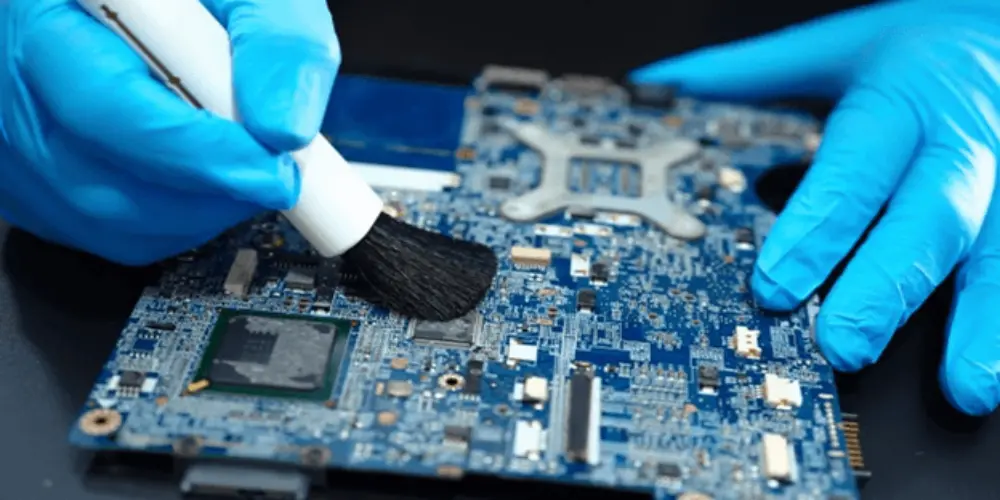
Manual cleaning of circuit boards is a common and flexible method. This PCB cleaning method does not require expensive equipment. Especially for PCBs with unique shapes or that require special materials for cleaning, manual cleaning is more efficient and less costly.
Advantages:
- The costof cleaning is low.
- It is easy to obtain tools and materials.
- Operators can accurately clean specific areas.
Disadvantages:
- Cleaning results highly depend on the operators’ experience.
- Maintaining consistent cleaning outcomes is challenging, and several cleanings could be necessary.
- The cleaning efficiency is low which is not suitable for large batches of PCB cleaning.
- May cause damage to delicate components, not the best choice for high-density PCBs.
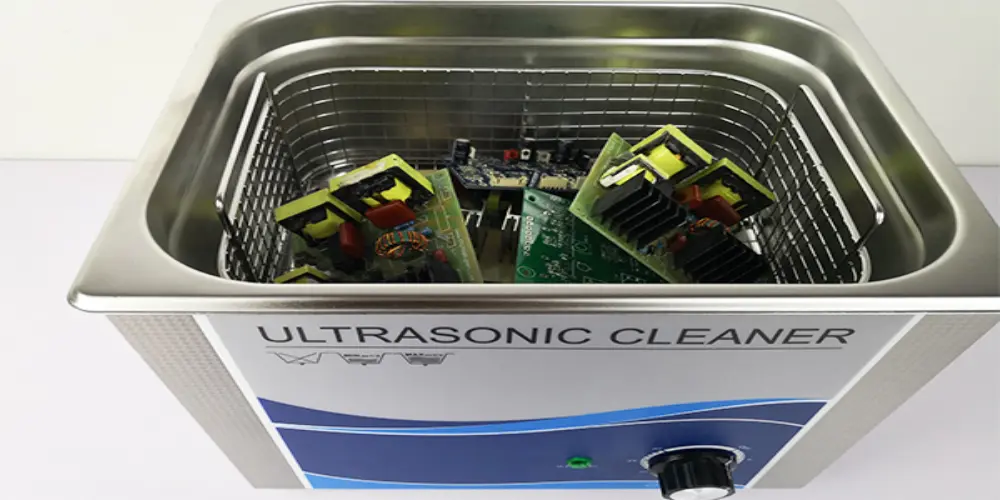
Ultrasonic Cleaning
Ultrasonic cleaning uses high-frequency sound waves to create bubbles in a dedicated cleaning solution. It is a process called cavitation which billions of tiny bubbles explode and remove contaminants from the PCB. These tiny bubbles can reach all exposed surfaces of the PCB, even the smallest or hard-to-reach areas. The cleaning frequency is generally 20-400kHz, and combined with a dedicated chemical solvent, the cleaning effect can be significantly improved.
Advantages:
- The circuit board can be thoroughly cleaned with high efficiency.
- This method can be used to clean components and PCBs with complex geometries.
- It is suitable for cleaning complex or dense circuit boards.
Disadvantages:
- High-frequency vibrations may cause damage to sensitive components.
- Need to purchase a dedicated ultrasonic cleaning machine, the operating cost is also relatively high.
- The pollutants on PCB are relatively stubborn and require other cleaning methods.
Inline Cleaning System
When large batches of circuit boards need to be cleaned, inline cleaning machines are an ideal choice. This is an automated process. PCBs need to go through pre-cleaning, main cleaning, rinsing, and drying steps in sequence. Inline cleaning system uses air spray technology or water-based cleaning agents to efficiently remove contaminants from circuit boards.
Advantages:
- High degree of automation, suitable for large-volume circuit board cleaning.
- The cleaning effect is stable because each PCB goes through the same steps.
- The whole process requires almost no human intervention, reducing labor costs.
Disadvantages:
- The purchase and installation costs of the equipment are high.
- This system requires a complete production line and occupies a relatively large space.
- The maintenance and operation costs of the equipment are high, and the cleaning fluid and cleaning nozzles need to be replaced.
Batch Cleaning Machine
The working principle of the batch-cleaning machine is very similar to the technology of the dishwasher. All its steps are performed in a process chamber. Multiple circuit boards are placed in the process chamber at one time. Solvents, detergents, etc. are sprayed through the nozzles on the rotating spray arm for cleaning. The cleaning effect depends mainly on the amount and coverage of the cleaning agent, rather than high-pressure spraying in an in-line process.
Advantages:
- A bunch of PCBs are cleaned at the same time, and the cleaning effect is consistent and stable.
- It is suitable for small and medium batches of circuit boards, with high flexibility. Online cleaning requires multiple steps to operate continuously.
- The equipment is relatively cheap and occupies a small area.
Disadvantages:
- The efficiency is relatively low, and it takes a long time to clean a batch of circuit boards at one time.
- The PCB needs to be manually placed in the processing chamber and taken out after cleaning.
- The cleaning effect is limited, and stubborn contaminants are difficult to clean thoroughly.
Gas Phase Cleaning
Gas phase cleaning can also be called vapor phase cleaning. It uses volatile chemical solvents to boil to generate steam to dissolve pollutants on the circuit board. The circuit board is exposed to the steam, and the steam condenses and dissolves the pollutants. Finally, the entire PCB cleaning process is completed by evaporation and drying.
Advantages:
- Steam can penetrate small gaps on the circuit board to clean hidden dirt.
- The cleaning efficiency is high and it can be dried immediately after cleaning.
- The vapor of the solvent can be recyclable and reused by condensing.
Disadvantages:
- The solvent price is expensive.
- Both buying and maintaining the machine is expensive. And the equipment sealing requirements are high.
- It is not effective in removing water-soluble or inorganic substances.
Common Circuit Board Cleaning Agents
Different cleaning agents exert different cleaning effects on circuit board impurities. Selecting a suitable cleaning agent can effectively enhance the PCB cleaning effect.
Isopropyl Alcohol (IPA)
The most common solvent for PCB cleaning is IPA, which dissolves a broad range of non-polar substances. It can quickly dissolve grease, rosin, and flux residues on printed circuit boards. Using 99% or higher purity IPA can eliminate impurities from being introduced. The cleaner evaporates quickly and leaves no residue.
Deionized Water
Deionized water has removed ions and impurities and can be safely applied to circuit boards. It can be used to clean water-soluble stains. Deionized water is also in conjunction with other cleaning agents to rinse residual cleaning agents.
Flux Removers
Flux can improve the flow of solder. Once soldered, it might stay on the circuit board. This may result in the circuit board corroding and failing. Flux remover is specially designed to clear rosin, resin-type, and other fluxes. This cleaner is usually in the form of a spray for easy use.
Ultrasonic Cleaning Solutions
This cleaning solution is created especially for ultrasonic machines. Its ingredients are usually distilled water and detergent, and may also be a baking soda mixture. Used with ultrasonic equipment, ultrasonic cleaning solutions are very effective.
How to Clean Circuit Boards Manually: A Step-by-Step Instruction
Manual cleaning is a cost-effective and practical method of cleaning circuit boards. Then, we will walk you through the 9 steps involved in cleaning a circuit board by hand. To guarantee a seamless operation, you must first prepare the required tools and materials for PCB cleaning.
Tools and Materials Needed:
- Compressed Air: This is used to remove loose dust and debris on the circuit board.
- Anti-static Brush: This brush avoids damage to components caused by static electricity and can gently remove stubborn dirt.
- Cleaning Agent: Use isopropyl alcohol or another right agent.
- Cotton Swabs and Tweezers: Cotton swabs are mainly used to clean tiny areas. Tweezers can pick up and remove small impurities.
- Lint-free Towel: A lint-free cloth is used to dry the circuit board without leaving fibers or residue.
- Deionized Water: This water will not damage the circuit board and can rinse the board and remove any residual cleaning agent.
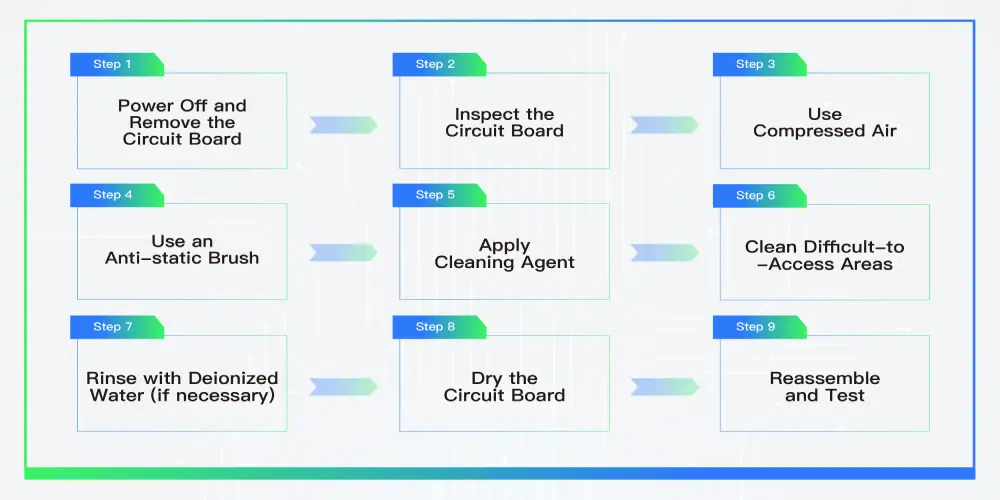
Step 1: Power Off and Remove the Circuit Board
Turn off the power of the device and carefully remove the circuit board that needs to be cleaned.
Step 2: Inspect the Circuit Board
Check the circuit boards for corrosion, damage, and dust buildup, and determine areas that require special cleaning attention.
Step 3: Use Compressed Air
The air can must be held upright and away from the circuit board. Then use it to blow loose dust or debris off the circuit boards.
Step 4: Use an Anti-static Brush
Use an electrostatic brush to brush off any leftover dust and dirt on the board, especially for the areas between closely spaced components.
Step 5: Apply Cleaning Agent
Choose an appropriate cleaning agent for cleaning, focusing on areas with visible dirt and residue. You can wipe it with a lint-free cloth or cotton swab dipped in detergent.
Step 6: Clean Difficult-to-Access Areas
Tweezers and cotton swabs can be utilized to clean difficult-to-access areas, such as closely spaced traces or underneath components.
Step 7: Rinse with Deionized Water (If Necessary)
If you are using a cleaner that requires cleaning, you will need to clean the circuit board with deionized water.
Step 8: Dry the Circuit Board
You can wipe the circuit board gently dry using a lint-free cloth or allow it to dry in open air in a well-ventilated area.
Step 9: Reassemble and Test
Once the board is dry, reassemble the board into the device with care. Connect the power and try to see if it works as it should.
Conclusion
Cleaning circuit boards is a critical process to achieve their optimal performance and longevity. Following the correct PCB cleaning process and choosing the appropriate method can effectively clean circuit boards and avoid component damage. Whether you are cleaning flux residue, dust, or other contaminants, these five PCB board cleaning methods (manual cleaning, ultrasonic cleaning, inline cleaning, batch cleaning, and vapor phase cleaning) can provide reliable and effective solutions for different cleaning needs and situations.